Personalisation
One method of maximising the use of your Google account is through personalising your emails. By doing this, you can change the font and colour of the text. You can also add signatures, which could be your contact details in text or an image. It’s all up to you really.
If you would like to change how others see your messages, here’s how:
At the upper right hand of Gmail’s dashboard is a gear icon. Click that and go to ‘Settings’.
In Settings, you’ll be right on the General Settings Tab. Search for ‘Default Text Style’.
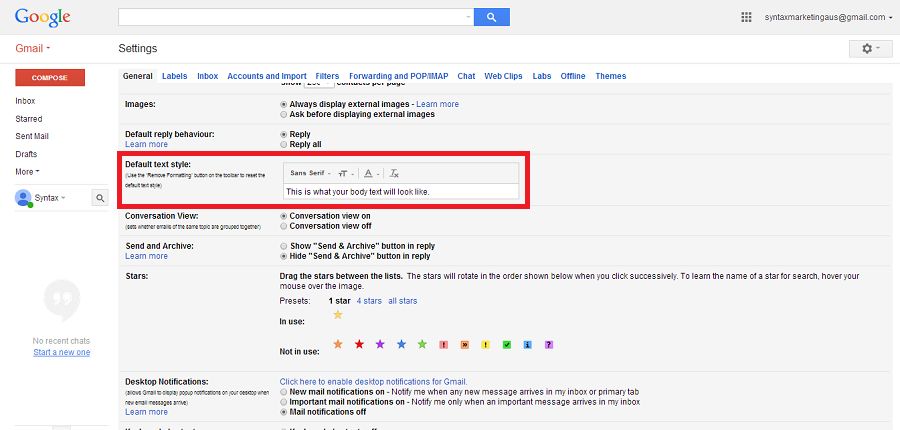
From that section, you can change the font, font size and font colour.
To add a signature, find ‘Signature’ on the same page. Click the radio button to enable your signature. Type in the text that you want to appear in the Signature section of your email. If you want to use an image, click on the image icon (next to the link or chain symbol).
Save your settings.
Customisation
Another way of maximising the use of your Google account is through customisation. If you are new to Gmail, or if you just never got around to changing the standard appearance, here are some tips on how to customise it to your liking.
At the upper right side of your Gmail dashboard, click the gear icon. From the dropdown, click ‘Themes’.
You can then choose a theme for your Gmail account. Choose from Colour Themes, HD Themes, Custom Themes and Classic Themes.
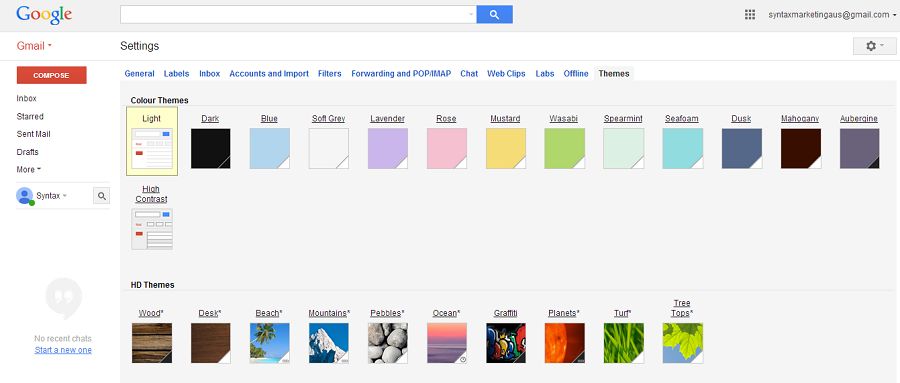
If you see a theme you like, simply click on it.
If you don’t like anything from the Colour, Classic and HD Themes, opt for a Custom Theme. You can choose from a Custom Light and Classic Dark theme.
In this example, we’ve opted for a Custom Light Theme.
After you clicking ‘Custom Light Theme’, a pop-up will appear. Here, you get to select, or upload an image you would like to use for your background.
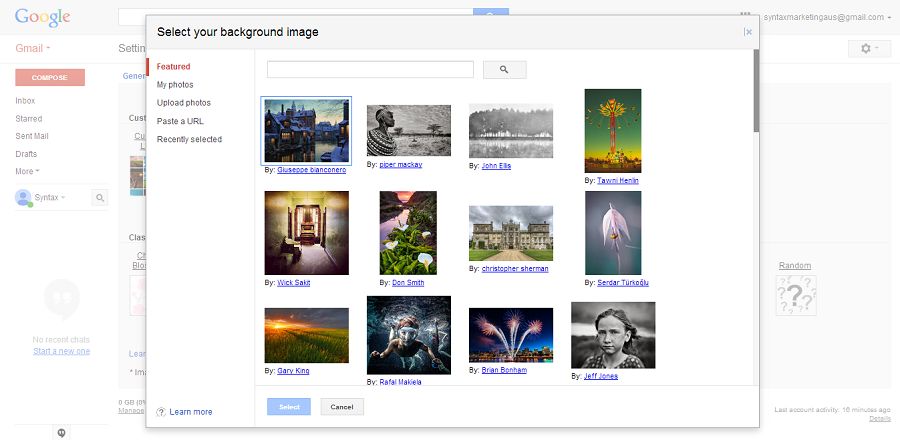
Choose a featured image or upload one of your own and click ‘Select’.
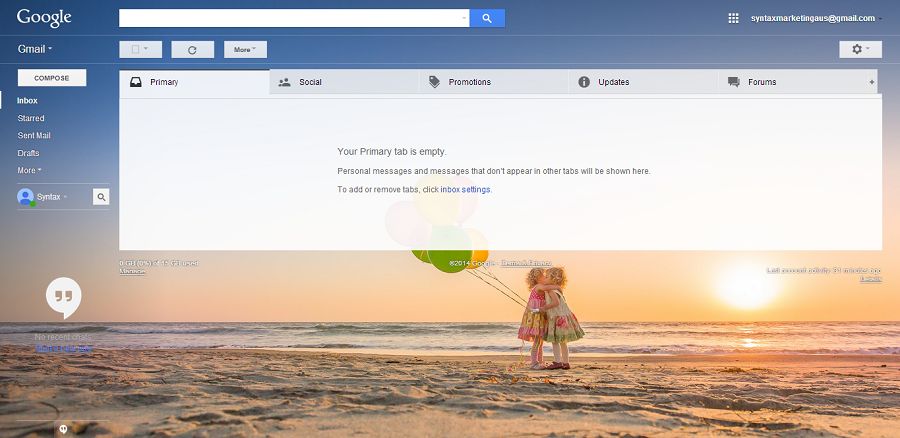
Your new theme will now show on your main page.
Organisation
Another popular option for maximising the use of your Google account is organising it. Generally, your Gmail account is all for sending and receiving emails. But, did you know that you can also organise the emails you receive based on ‘categories’?
As a new Gmail account user, you will see three to five tabs on your main page. These tabs are folders that filter your emails, based on ‘categories’.
The five tabs are Primary, Social, Promotions, Updates and Forums.
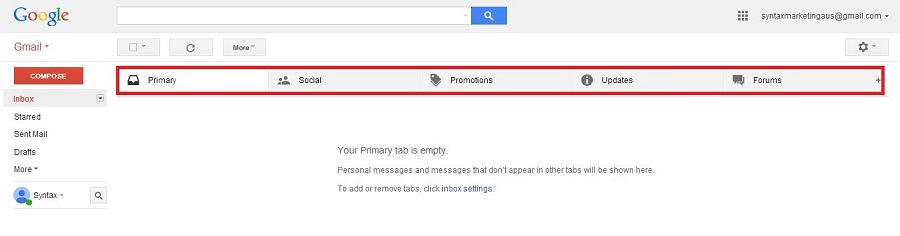
If you enable these folders, Gmail will send ‘categorised’ emails into each folder. Here is a brief description on what emails would go into each folder:
Primary
Person-to-person conversations and messages that don’t appear in other tabs.
Examples: no-reply
Social
Messages from social networks, media-sharing sites, online dating services and other social websites.
Examples: Google+, YouTube, Image Sharing Sites, Facebook, Twitter, etc
Promotions
Deals, offers and other marketing emails.
Examples: Google Offers, Merchant Newsletters, Commercial Promotions, etc
Updates
Personal, auto-generated updates including confirmations, receipts, bills and statements.
Examples: Confirmations, Bills, Receipts, Shipments, etc
Forums
Messages from online groups, discussion boards and mailing lists.
Examples: Google Groups, Mailing lists, Online Communities, etc
The purpose of the various folders is easy organisation. Emails from friends, family or colleagues would go to your primary folder while social media notifications would go to your social folder. It helps you maintain organisation in your inbox, and avoid missing important emails because they got ‘buried’ in newsletters and notifications.
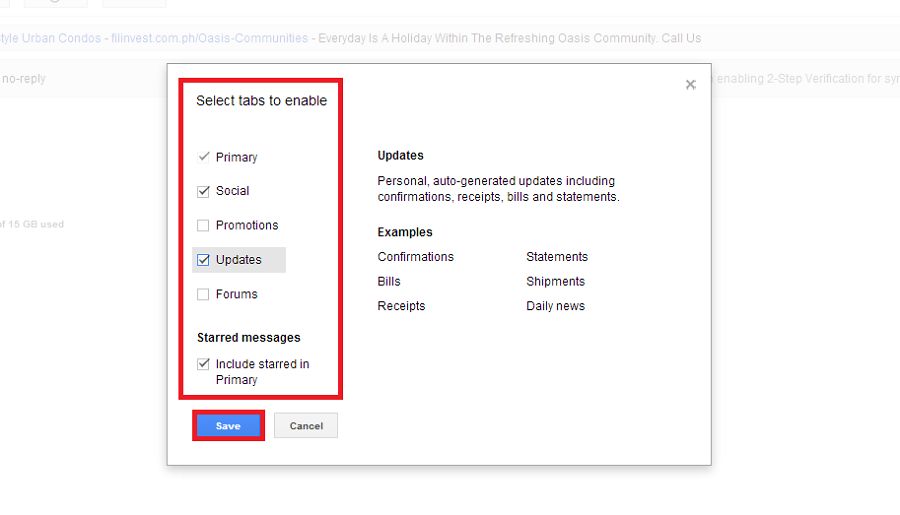
To enable your handy-dandy folders, click on the gear icon and go to ‘Configure Inbox’.
Once you click on it, a pop-up will appear. To enable the different folders, click on the checkbox of the folder you would like to enable. Once finished, click ‘Save’.
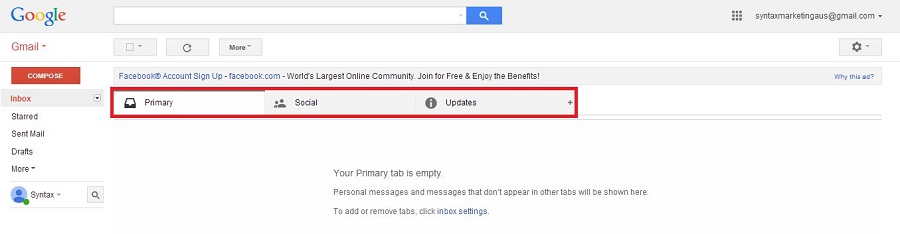
You will now see your chosen folders on your Gmail dashboard.
Socialisation
The next way of maximising the use of your Google account is in the area of socialisation. Google + is easily accessible through your Gmail account. So, why not make use of it?
Google + is a great way to present yourself to your contacts, whether they are friends, family or colleagues. And, if you have a business, it is a great way to reach across different circles and improve your online presence.
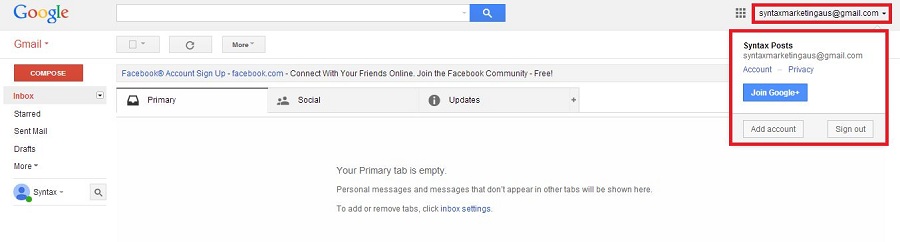
From your Gmail account click on the downward arrow next to ‘name@gmail.com’ at the upper right hand of the page. Once you see the dropdown box, click on the blue button “Join Google+”.
Create Google Plus Account
A new tab will open where you can set-up your Google + profile.
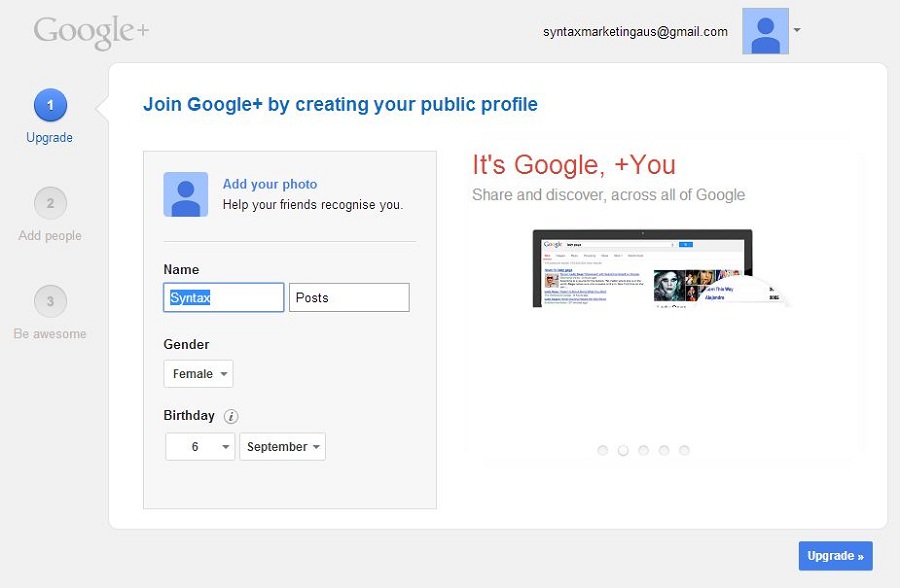
Add your photo, name, gender and birthday here. When you’re done, click ‘upgrade’.
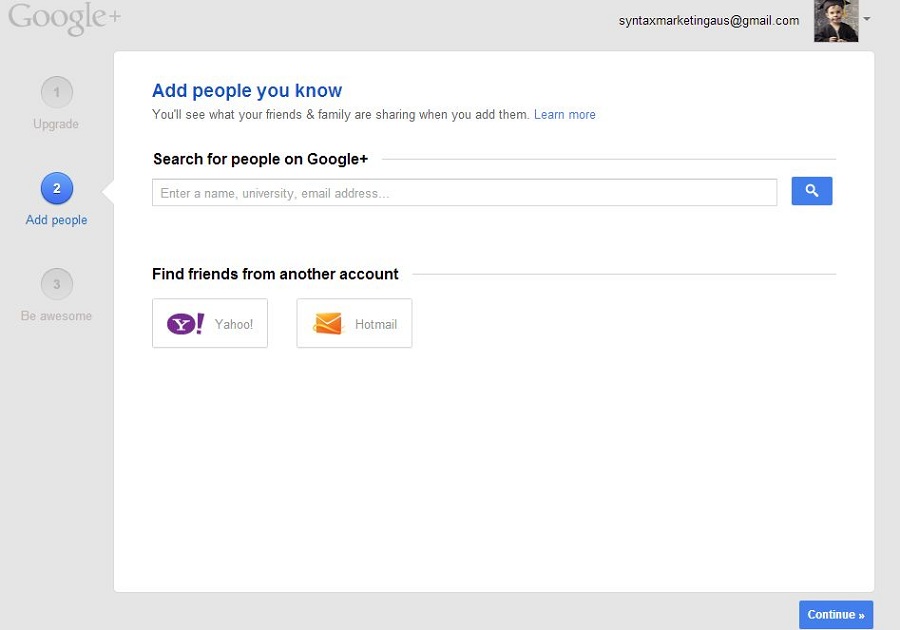
The second step will allow you to add contacts you know. You can either search for people on Google + or import friends from your Yahoo! or Hotmail account. After adding contacts, click ‘Continue’.
The next thing you can do is follow notable Google + pages. These are within categories, ie. News, Food & Drink, Science & Nature, etc.
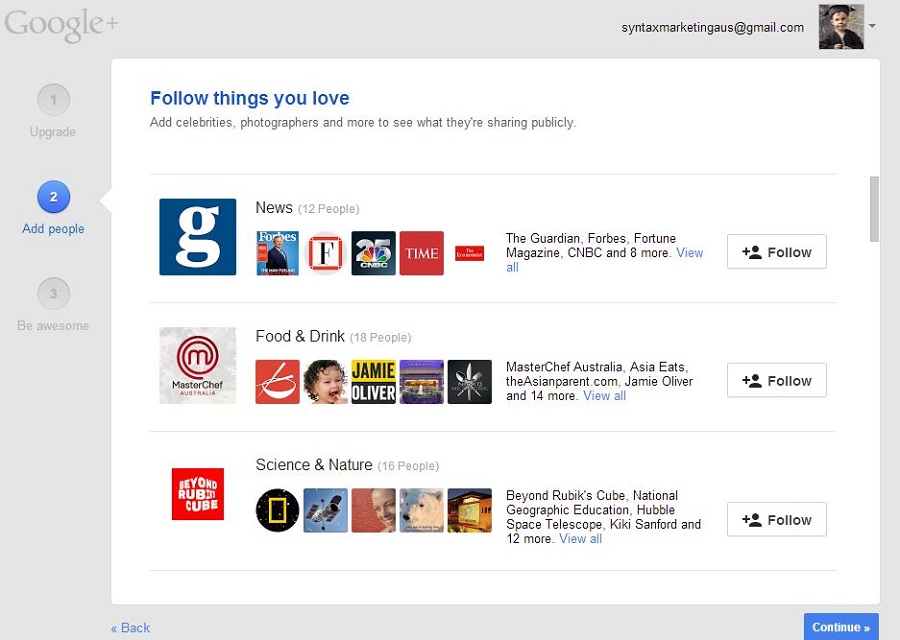
Once you ‘follow’ someone, they will be added to your ‘circles’.
The third step will ask you to “put a face to your name”. This is where you can update your profile and primary photo.
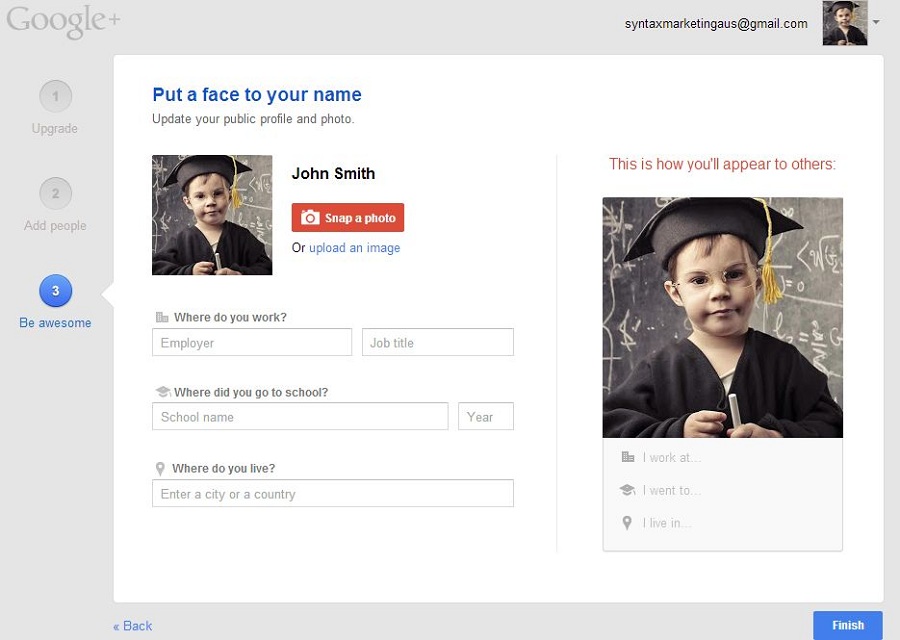
Once you’re done updating your profile, click ‘Finish’. You’ll be taken to your freshly created Google + account.
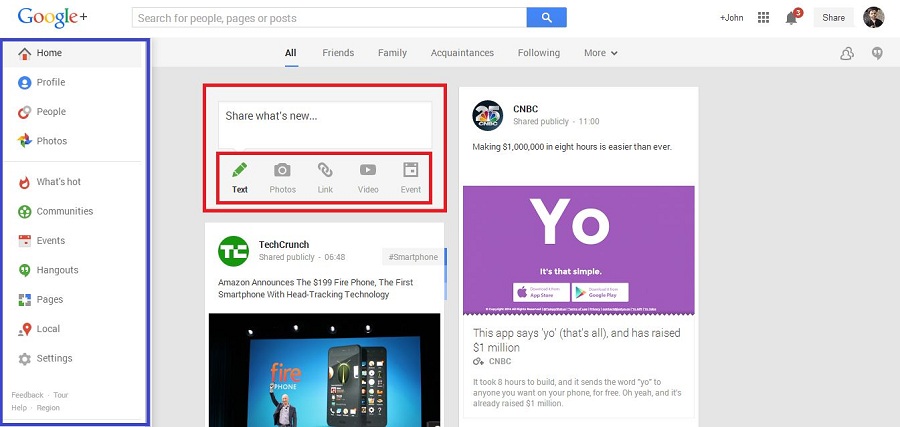
In the red box below, you’ll see this is where you can update your ‘circles’. You can post text, images, links, videos and even events here.
The blue box shows your Home’s dropdown navigation menu. Here, you can view how your profile looks, see people who are in your circles, view photos and much more.
Collaboration
And of course, collaboration is another way of maximising the use of your Google account. Gmail allows you to attach files of up to 25 MB. However, if the person you’re sending the files to has smaller attachment limits, they won’t be able to open the files. In case you need to send a stack of files to an individual or a team, there is an easy way to do so – Google Drive!
Google Drive is easily accessible, as are other Google applications and services, from your Gmail account.
Google Drive is a cloud-based storage and back-up application. With Google Drive, you can store documents, images, videos and much more. You can also back-up documents on your computer, just in case your hard drive crashes (ouch!).
Google Drive also lets you collaborate with others. You can share your files and even give them permission to view or edit.
From your Gmail dashboard, click the collage-like ‘9 boxes’ icon. Click on the Google Drive icon.

Google Drive can be a computer-based application or an online web application.
Computer-based simply means that you will have to download the program to be able to store and back up files directly from your computer.
Online-based, on the other hand, means that you need to upload files for it to be stored and backed-up on Google Drive.
Computer-Based Drive
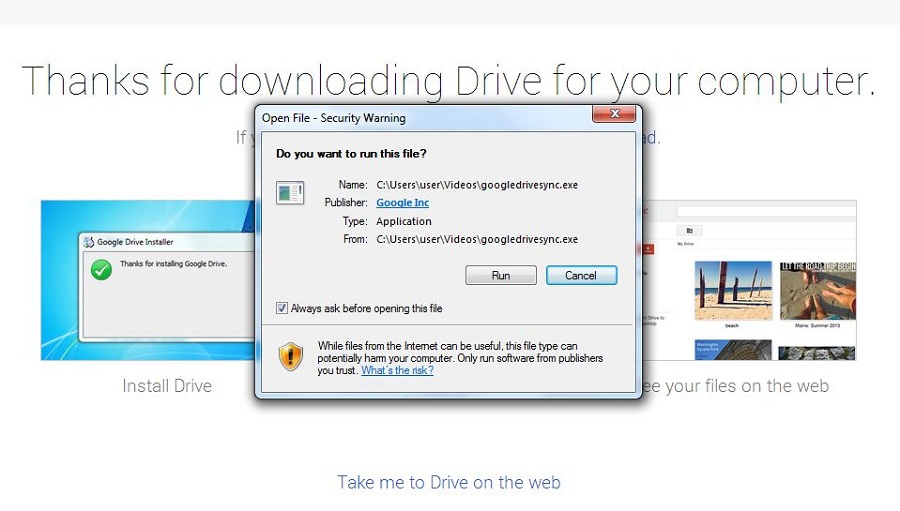
To save Google Drive in your computer, you’ll be asked to ‘Download Drive’. Click on the button and save the file to download.
Open the downloaded file. Click ‘Run’.
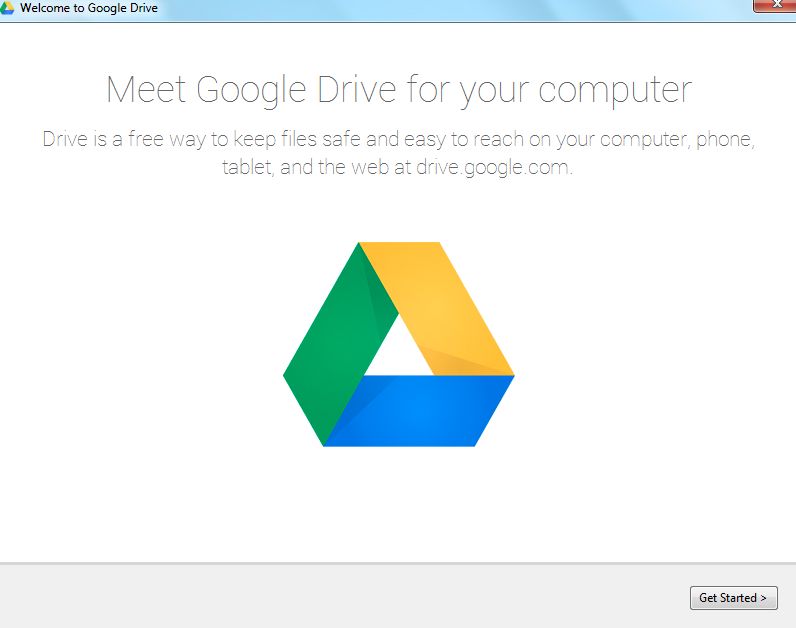
After running the program, it will take a few minutes to download. After downloading, you will see a welcome page. Click ‘Get Started’ to start uploading files to your Google Drive account.
Online-Based Drive:
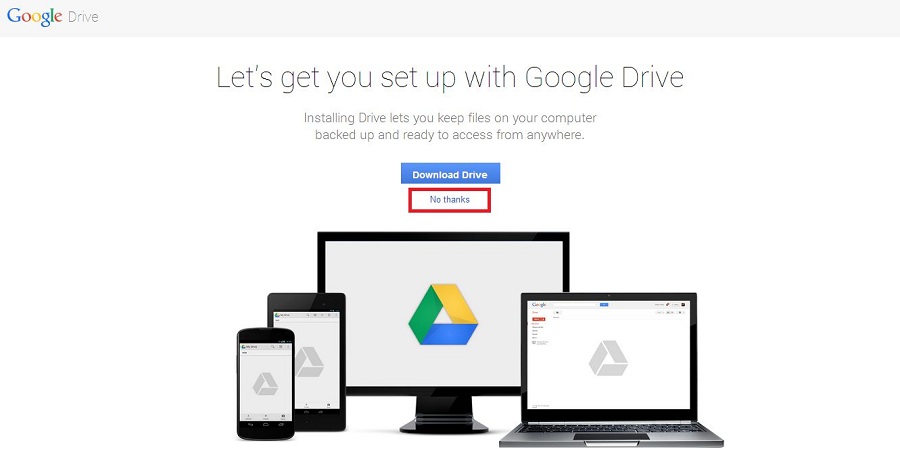
Go to the Google Drive application. Instead of downloading Drive, choose ‘No Thanks’. You’ll be redirected to your online Google Drive account.
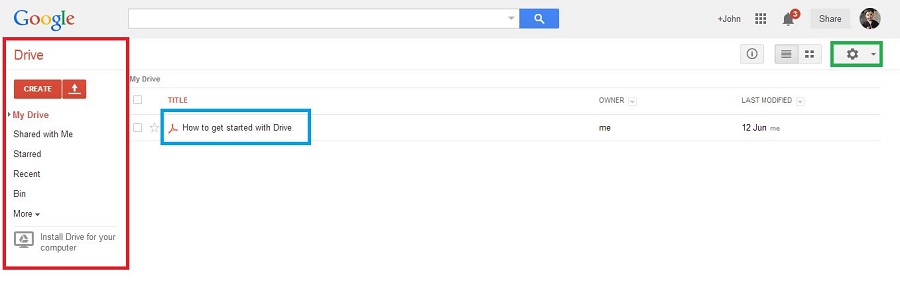
To get started, choose an action at the left navigational menu, as shown below in the red box. To view the file on how to get started, click the title of the document, as shown in the blue box. In the green box highlights where you can change your settings.
Scheduling
And lastly, another way of maximising the use of your Google account is through scheduling with Google Calendars!
Google Calendar doesn’t just help your note your appointment and events. It also helps remind you of them, and you can even share your schedule with friends and family. You can also sync your Google Calendar account to your mobile so you’ll be able to carry your schedule with you… everywhere!
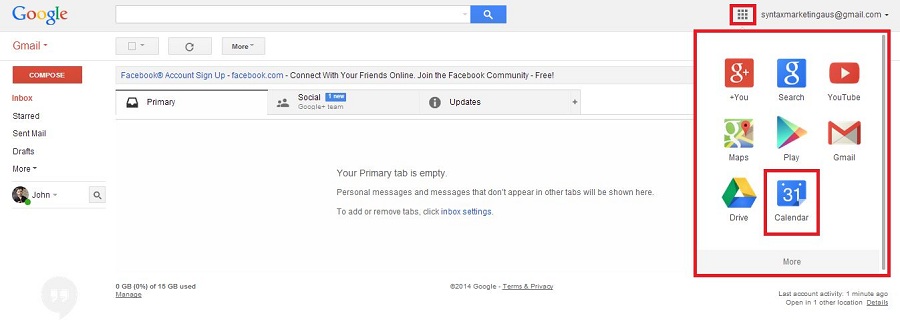
From your Gmail account, click on the App icon and go to Calendar.
You’ll be taken to your Google Calendar page.
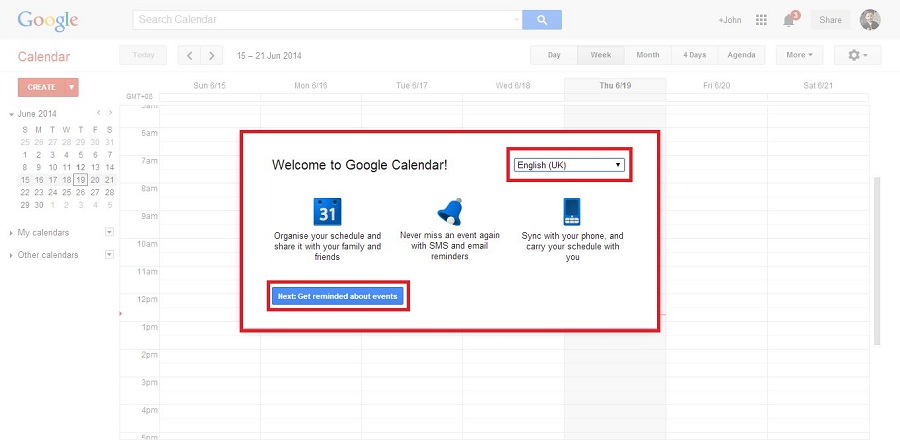
First off, select your preferred language and click ‘Next’.
The next step will ask you how you would like to be reminded of events.
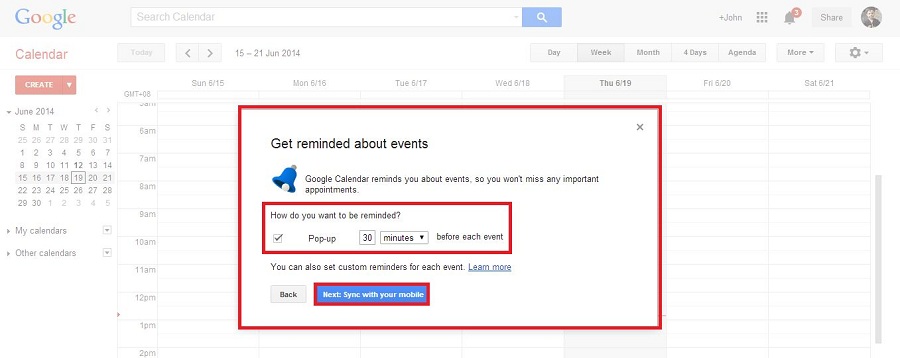
After setting up your preferences, click ‘Next’. This is where you can sync your calendar with your mobile or tablet.
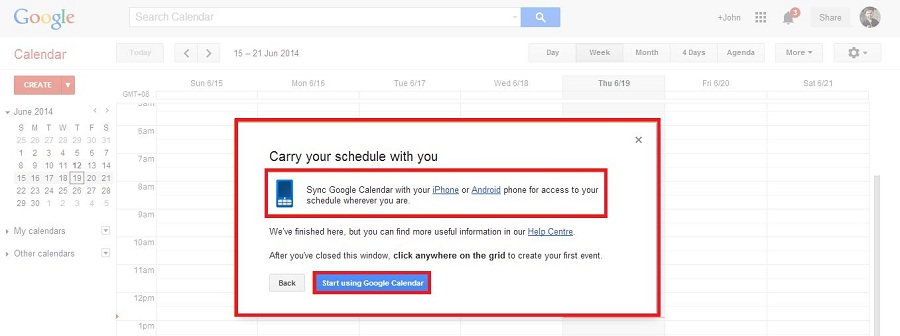
After syncing your Google Calendar with your mobile, get started with your Google Calendar account by clicking “Start using Google Calendar”.
You’ll be directed to your Google Calendar main page.

At the left side, in the red box, you can create different calendars. The blue box shows your calendar. To add an event, simply double click on the box corresponding to the correct date and time you want to add a note to. The green box contains the gear icon or your settings icon. This is where you can edit the settings of your Google Calendar account.
Google prides itself on offering only the best for its users.
According to Google, “Since the beginning, we’ve focused on providing the best user experience possible. Whether we’re designing a new Internet browser or a new tweak to the look of the homepage, we take great care to ensure that they will ultimately serve you, rather than our own internal goal or bottom line.”
With Google thinking of ways to make tasks easier, take advantage of its services and start maximising the use of your Google Account now!